The Asshole’s Guide to Product Validation
How to Test Your Idea With a Decoy Sales Page


If you waste as much time reading startup books and blogs as I do, you probably see the advice “test your idea first!” a lot. Unfortunately however, despite everyone agreeing that you should test, there’s not much consensus regarding how. Common methods I see are:
- Put up a “X is coming soon!” landing page and see how many email addresses you collect — this is likely to correlate with how many people are interested in your product to some degree, but it’s noisy. There’ll be false positives from people who want to keep an eye on your product without necessarily wanting to buy it, and false negatives from people who would’ve bought it if it was ready now, but can’t be bothered waiting.
- Survey potential customers to see if they’ll be interested — talking to potential customers in general is always good, but it’s a lot of work finding enough responses base a decision upon — plus respondents tend to politely pretend to be interested right up until they actually have to pay for something.
- Email 10 friends, pitch them on the product and get them to pay you in advance — this suits entrepreneurship influencers with big networks, but for the rest of us it’s a stretch to already know 10 people who both have a use for the product and trust us enough to throw money at it. Success through this method might mean you’re onto a winner, or it might mean you have supportive friends and a way-too-broad product idea.
There is another method, which I’m such a big fan of that I’m building an entire platform in order to make using it quicker and easier. This guide, however, is going to describe the whole process from scratch in a platform-agnostic way, with examples from my own experience doing it the long way.
It’s ruthless, but it’s effective. Leave your sense of politeness at the door — this is how to validate like an asshole.
The Concept
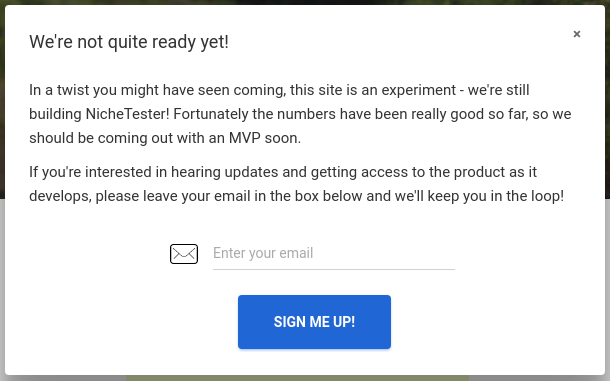
The idea is to create what Rob Walling describes as a “mini sales site” in Start Small Stay Small, and which has been known in the mail-order marketing world for decades as a dry test. The idea is to set up a landing page that looks like it’s selling our finished product, run ads against it, and measure how many people click the “buy” (or “try”, or “sign up” etc.) button. When this happens, a little modal (less-obnoxious pop-up) comes up, informs the customer that you’re still testing the idea and that it’s not ready yet, and asks them to leave their email to be notified when it is.
There’s a good chance that you’re not completely comfortable with this idea. That’s normal — it means you’re not an asshole! — but you should still validate like one. The magic of this method is that it keeps the experiment as close to real conditions as possible — there’s no way to accidentally bias the test by only using friends who want to make you happy, or only picking certain kinds of people to test on. You’re using ads to randomly pick people from your target market, then measuring whether they actually do what you need them to.
… is this OK?
This might make you feel like a cybersquatter pretending to sell discount Ray-Bans, but the crucial difference is that you actually intend to sell your product. If enough customers click the “buy” button then they are going to get the product, they’re just going wait a while. The only reason you won’t be delivering the product is if you discover barely anyone actually wants it, in which case barely anyone will have realized you didn’t have it ready to ship anyway.
In any case, my experience is that people are surprisingly understanding of the need to test the market. When I was using this process for NicheTester, I didn’t get get any hate mail from visitors or anger from people I subsequently talked to, and a pretty decent percentage of people who converted even proceeded to sign up for updates after the ruse had been explained.
If you’re still not comfortable there are still a lot of tweaks you can make — putting a message explaining that the product is still in development at the bottom of the page, for instance. It’s up to you, but in general you want to make your page as much like the real one will be as possible, to get the most accurate results.
It’s also important to stay within the lines legally — in the United States that means disclosing that you may not end up shipping the product if the user clicks the buy button.
Who Will This Work For?
Naturally this isn’t a silver bullet , just another method with its own advantages and flaws. For a start, it relies on potential customers already looking for the solution you’re providing. If you’ve come up with something so novel that people don’t even know that they need it yet (think Twitter in 2006), they’re unlikely to click on an ad for it. It is, however, well-suited for a lot of the ideas on the more grounded side of the entrepreneurship spectrum — B2B SaaSes, productivity tools, ebooks, online courses etc.
The rule of thumb is that people should be searching for what you’re providing already — fire up Google Keyword Planner and have a look.
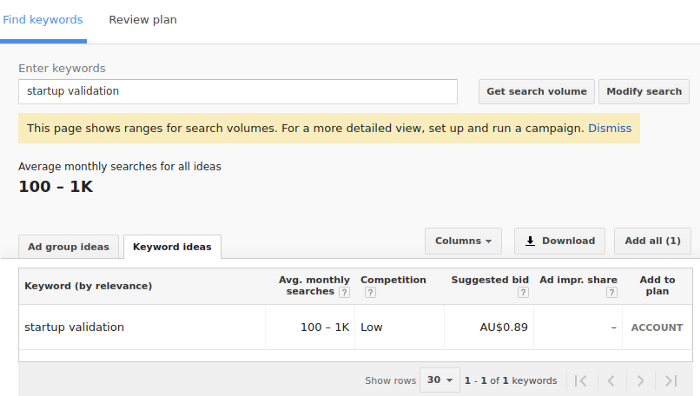
You’re looking for a couple of keywords with at least 100–1k monthly searches. If it’s < 100 for everything, then you’re going to struggle to validate your idea with this method.
If this is the case, first take a long hard look at what you’re doing — it’s very likely that there just isn’t a market for your idea. If you’re still absolutely sure that you’re onto something then you can try channeling people towards the page in a different way, for instance Facebook ads. This guide is going to cover using Google Ads though, so adjust where necessary.
You’re looking for keywords that you can run ads on for at most a few dollars per click, preferably less than $1. If you find that the most obvious keywords are too expensive, try to focus on what makes your product unique compared to the competition when picking search terms. If you’re not doing anything unique… see the paragraph above.
Note also that this technique costs money — unfortunately the only way to run ads for free is to make them so bad no one clicks on them! Expect to spend at least $100 using this method - not super-cheap, but still cheaper than working for 6 months on something no one wants.
Step 1: Flesh Out Your Pitch
Before you start throwing together landing pages, you’ll have to figure out exactly what you’re selling and why people should buy it. For this, I recommend reading the Strategy part of this excellent post on the ladder.io blog. At minimum you should have completed a Lean Canvas — this will give you a crucial understanding of what your unique proposition is and who you’re proposing it to, which will feed into what you create later.
Step 2: Build a Minimal Brand
While effective branding is incredibly important for an established business, all you need from a brand is to look legitimate. That’s all. If you’re like me you’ll probably fall into the trap of spending hours pouring over color combinations, imagining what they’ll look like on the sign outside your future headquarters building — but try not to! As soon as your branding is reasonable enough that you think you’d buy from a site that used it, skip immediately to step 3.
My process is something like this: first pick a primary brand color. It doesn’t actually matter what, but if you want some questionable science to help with your decision, you can consult a guide like this one:
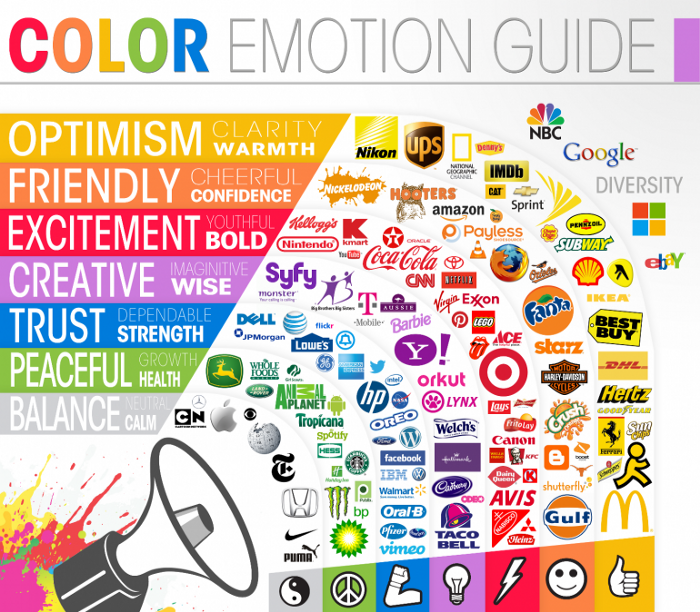
Next up you need a highlight color to go with it. The simplest way is to open up Kuler (or any Color Wheel), set it to “Complementary”, put in the colour you picked and then take the complement of it.
After that you’ll want some kind of logo. Try to keep in mind that this isn’t the logo you’re going to have when you launch on the NASDAQ — all you need now from this is something that makes you look like a real company.

If you have a friend who’s great at graphic design then you can work with them to produce something basic, but seeing as this is a guide for assholes and assholes don’t tend to have a lot of friends, it’s no problem if you don’t — getting a basic logo can actually be pretty cheap and easy.
The easiest way is to just write the name of your product in a certain font, using the first letter for situations where it needs to fit in a square (for favicons etc). Open up a free font previewer like DaFont, put your product name in and pick one you like.

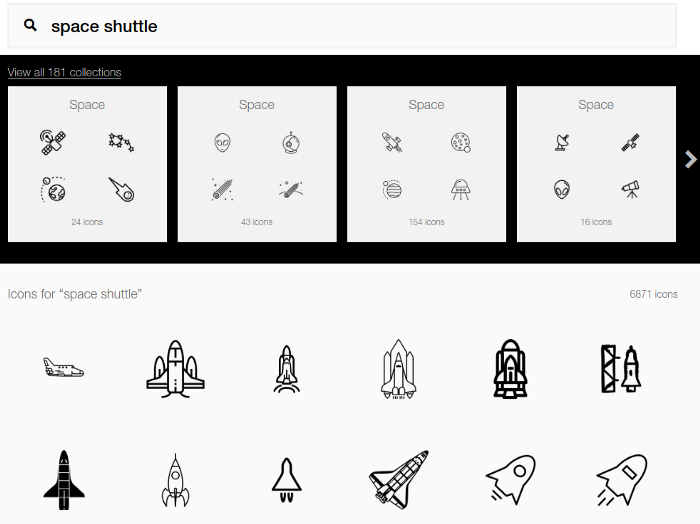
If you want a picture-based logo, go over to The Noun Project and start searching for icons that represent your product somehow. They could be a literal representation of exactly what it is, or something entirely abstract — it doesn’t actually matter as long as it looks professional.
Step 3: Create a Landing Page
Now to get our hands dirty! What you use to produce the landing page isn’t especially important — use whatever is quickest for you. If you know Wordpress then use that — there’s thousands of decent themes. If you know HTML/CSS, then it’s probably easiest to build a static Bootstrap site and get a theme from somewhere like Creative Tim. If you don’t have any technical experience then there are dozens of landing page generators out there, although many are a bit excessive for this use case in terms of both feature-set and price. The only requirement is that you’re able to monitor how many users click the buy button.
You might also find a perfect theme, but with no way to modify to use your brand colors and/or logo. Personally I’m a big fan of at least slightly modifying templates — the better ones tend to get used in a lot of places, and even if I don’t remember exactly where I saw a theme before, when I see it again somewhere else I tend to get a subconscious feeling of distrust. I don’t have any numbers for this though, so if you need to use a completely stock template go for it — I sincerely doubt it’ll make or break your test.
There are a number of schools of thought regarding how a landing page should be structured. I prefer setting it up as a multi-page sales site, like so:
- Product, which is the first page the user lands, describes the product, and has clear calls to action that lead to…
- Pricing, which has pricing tiers, “buy” or “try” buttons and a FAQ.
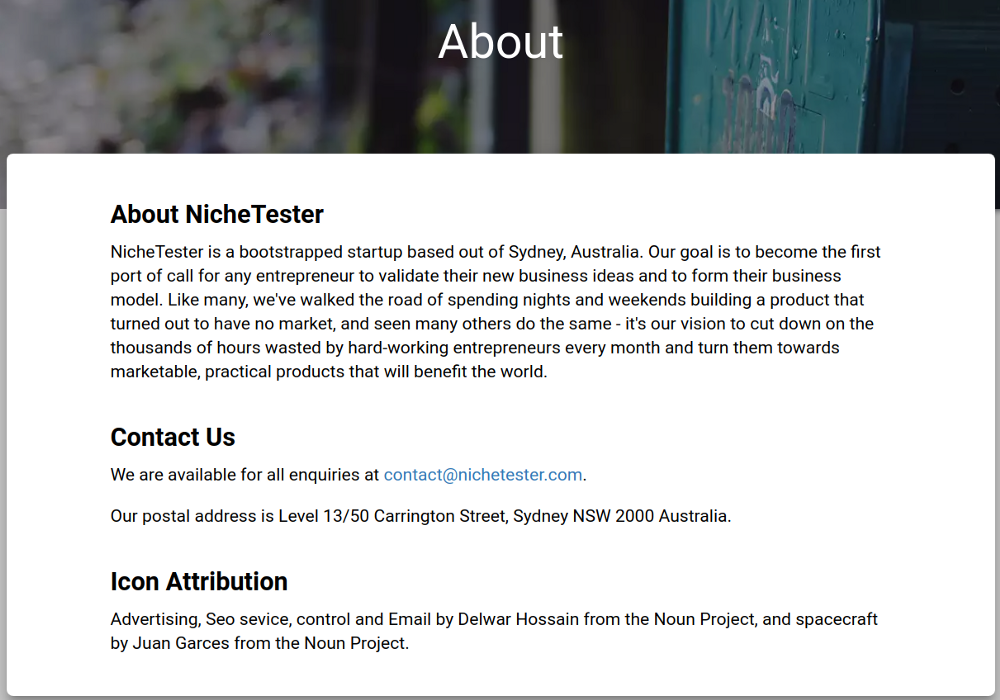
- About, with some background info about the company, where it’s based, how to contact you and attribution for Creative Commons resources you’ve used in the creation of the page.
The reason I like this layout is that although it’s less trendy than a single-pager that scrolls you up and down when you click links, the simplicity conveys a sense of legitimacy that’s hard to come by for a company that the customer has never heard of before. This structure has worked for me, but feel free to do it however you’d like.
Step 4: Write Some Copy
Now we’ve got a landing page set up, it’s time to fill it with content. I’m going to describe how I like to write a landing page, with the NicheTester page as my example — this is far from the canonical way to do it, so play around with the format if you like. The guiding principle is to keep it simple: explain exactly what your product is and how it helps as clearly and as early as you can. Don’t follow the example of big companies with oblique landing pages that don’t explain anything, these are often intentionally optimized for goals other than conversion, and aren’t good role models.
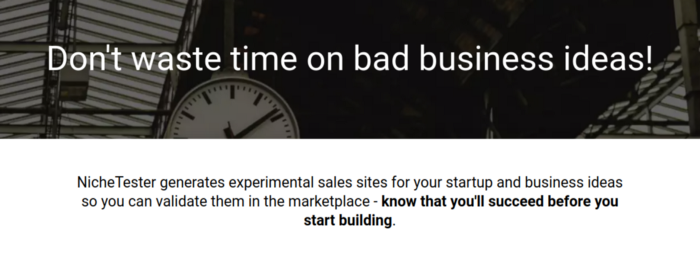
The first part of the landing page is an attention-grabbing title — a one-liner that immediately piques the user’s interest and makes them continue reading. Usually this is your product’s key value proposition — for instance the whole point of NicheTester is to stop entrepreneurs wasting time building a product that has no market, so at the top of my landing page it says “Don’t waste time on bad business ideas!”
Next, state exactly what your product does in one sentence — this one can be a bit longer than the title. This goes right under your title in smaller (but still large) text. Ideally this acts like a response to your attention-grabbing title — you just stated what the visitor will get out of the product, and the subtitle explains how that happens. For instance, “NicheTester generates experimental sales sites for your startup and business ideas so you can validate them in the marketplace — know that you’ll succeed before you start building.”
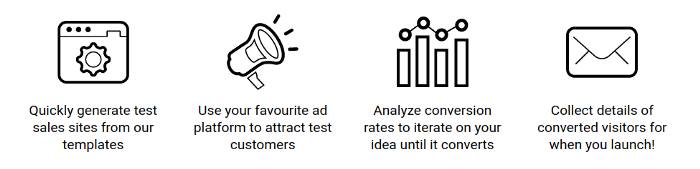
Once you’ve done that, ask “how does it work?” and try to fit it into three to five very concise bullet points — ideally the first couple should describe how the customer uses the product, and the last one should be the positive result. Once you’ve got a solid set of bullet points, go over to Noun Project (or your favourite icon site) and find an icon for each of them. Don’t beat yourself up about being generic — using a pair of cogs to represent “processing” or a wrench for “configure” makes the point just fine. Try to keep your icons in a similar style — you’ll find Noun Project’s “collections” feature useful for this.
The result should be a number of captioned icons that go across the page on desktop and down the page on mobile — these sum up your whole product in an easy-to-glance-at way, and the icons break up the text and stop the visitor from being put off by a wall of text right away.
By this time, some of your visitors will be ready to give it a go, so below your icons you want a Call To Action (CTA) button that leads to the pricing. Make sure this is in a distinctive color that draws the eye, and give it some kind of inviting caption like “Get Started!”.

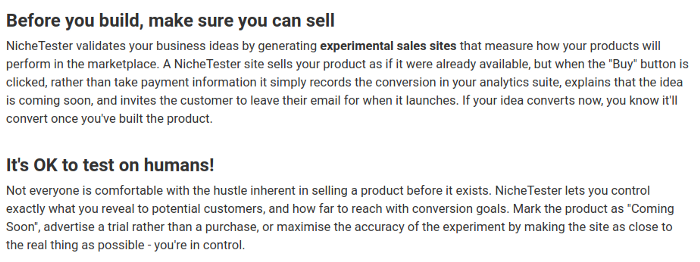
If your visitor doesn’t click this button but also hasn’t closed the tab, they probably want a bit more detail, so below this you want to write a few concise paragraphs describing your product, each starting with a heading that summarizes the paragraph. In general you want to describe:
- What it does
- How it does it (if this isn’t obvious from what it does)
- Why this is better than what the visitor might already be using
- Respond to major objections that they might have
Increasingly landing pages tend to have as little text as possible, preferring to put short videos, photos, or screenshots. I like to stick with text for two reasons — there are still plenty of people who like to have some detail, and it’s a lot quicker to write a paragraph of text than try to fake pictures or videos of a product that doesn’t exist yet!
Hopefully your excellent copywriting has convinced them by now, so put another CTA button below it to move them to the pricing page!
Step 5: Determine Pricing
Once again, pricing could fill several blog posts by themselves, and you should definitely read up at some point because it’s an incredibly important part of selling anything. I personally really like this guide, or if you want to go super in-depth, this massive PDF.
The main inputs for a minimum price are how much you want to earn and how big you think the market for your product is. For example, say your goal is to replace your job, you’re currently earning $100k per year, and you think you’re going to be able to find 1000 recurring customers. The minimum you can possibly charge is (100,000 / 12 / 1,000 = ) $8.33 per month, and that’s before you take into account expenses. If you can’t get a decent conversion rate at this price or above, then your idea is invalidated and it’s time to go back to the drawing board.
This isn’t where you should start though — you want to set the price as high as you can imagine anyone paying, then push it up some more, then see what happens. If you don’t get any bites, then you can reduce it and try again. An entrepreneur’s bias is to undervalue their product, so the benefit of playing around with pricing now is that there’s no harm in setting too high a price — you can’t be worried about losing sales because you don’t actually have a product to sell.
This is also an opportunity to play around with tiered pricing — e.g. if you’re selling a SaaS you might offer an individual plan with a minimal feature set, a small business plan that costs a bit more but provides more value, and an enterprise plan that costs a tonne but comes with priority support.
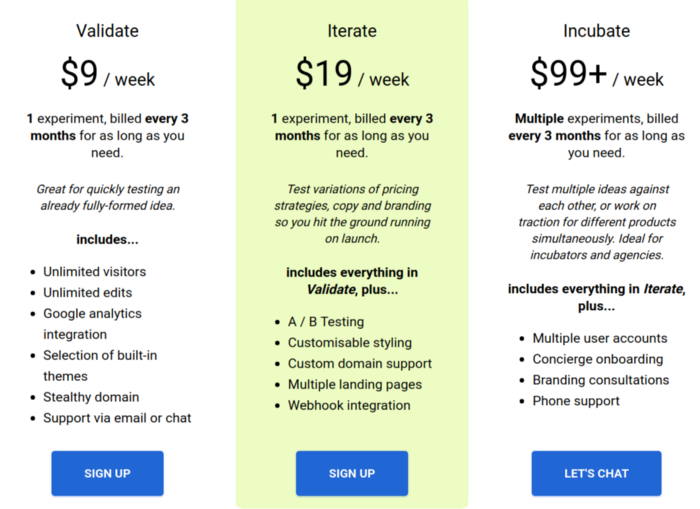
The usual strategy with this sort of classic 3-tier setup is to channel people towards the middle tier, which looks high-value next to the cheap tier but inexpensive next to the the premium one. If you find that more people are clicking on your cheap tier, then you might need to move some of its features to the middle one. If your premium tier is more popular than the cheaper ones, then you might have under-priced your product, or you might actually be in a niche full of bigger companies best served by a higher-touch sales model.
Step 6: Filler Content
You’ll also need to flesh out the rest of the site with filler content — a FAQ, details about the company, “Contact Us” etc. This serves mainly to make the whole site look like an actual sales site rather than an obvious experiment. Good FAQ questions include “what payment methods are accepted”, “can I cancel any time”, “do you ship internationally”, “what’s your refund policy” etc — try to think of what you would need to know before buying something like this, and write down what you think your answer will be when you launch.
You’ll also need some kind of basic “Contact Us” or “About” section. Make sure you put down an email address for your company — ideally a custom domain, but something like gmail is fine for now. Write a spiel about who you are, what your mission is and how you’ll achieve it. Don’t put down your names or pictures if you don’t want to — saying something along the lines of “XCorp is a new startup in the Boston area committed to providing fans of YWidgets with the best in quality and customer service” is fine. You also might want to put a picture of your city up, or a general map that doesn’t give away your actual specific address.
One last thing — if you’ve used assets (e.g. free noun project icons) that you need (or should) be giving attribution to, don’t forget to do so!
Step 7: Connect it to Analytics
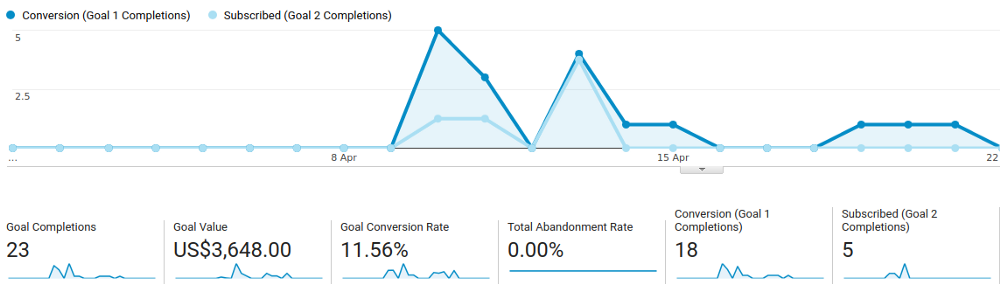
The key to this whole process is measuring whether the people who arrive on your site actually make it through to buying or trying the product, and for that you’re going to need some kind of analytics suite. I use Google Analytics because it makes it really easy to track conversion rates against individual ads, but if you’re using a platform with built-in analytics or you’re more familiar with something else that’ll work too.
The important parts are:
- The user always sees pricing before they’re counted as a conversion
- You record what price/tier they clicked on (even if you only have one pricing option you still want to keep it in case you change your pricing later)
- A click on a “buy” button (or equivalent) is recorded as an event as soon as its made.
In addition to making GA record the button click as an event, you’ll want to set up that event as a conversion goal.
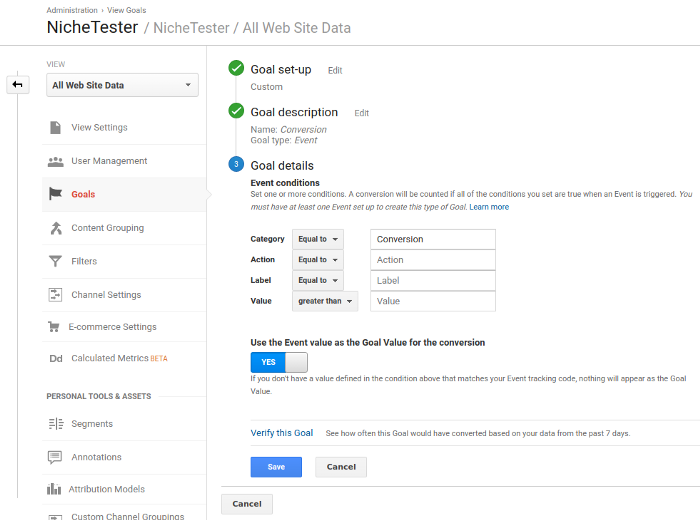
This’ll make it count towards conversion rate, and will integrate with Google Ads later on.
Step 8: Collect Emails (and do Interviews)
Once the user has clicked the “buy” button, a pop-up (or equivalent) should come up telling them that you’re still testing the idea, and to sign up to get notified about when it’s ready. The easiest way I know of to collect emails is to set up a Zapier webhook that inserts lines into a Google Spreadsheet, but if you’re more familiar with something else like Mailchimp or Drip you can use that instead.
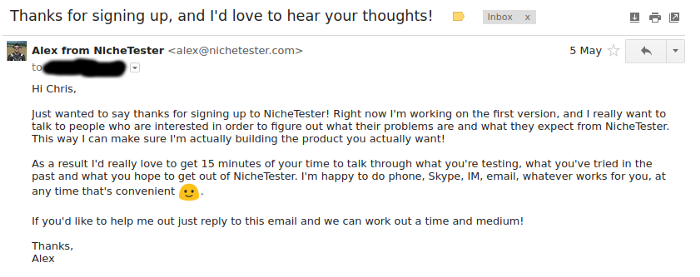
If you use these more advanced tools, you’ll probably be thinking about sending an automated signup email. Don’t! You want to manually send an email, after a delay, making it as personal as possible. People are used to getting automated emails when they sign up for something… and they don’t read them. By sending a manual email you massively increase the chances that the person will actually read it and respond.
Your email should thank them for signing up, and try to get them to talk to you about the problem that they’re hoping to solve with your product. If they do respond then set up a meeting using as interactive and personal a medium as possible. This means face to face if you’re in the same city, otherwise by webcam, otherwise by voice, otherwise by instant messaging, and if all else fails by email.
Even with manual emails don’t expect a massive response rate — maybe 1 in 10 at best, and even then most people will prefer to communicate over email. Given that it only takes 30 seconds to copy-paste an email and change the “Hi” line, this is still well worth doing.
Personally as an introvert (and an asshole!) I dread doing these kinds of interviews, but they’re the most valuable way you can possibly spend time on your startup. Reading through the success stories on Indiehackers, you’ll notice that talking to customers is something that comes up again and again for the more successful companies. Talking to potential customers will completely change your understanding of your product — you’ll find that pieces of your product you considered to be crucial don’t actually matter at all, and killer features that you hadn’t even considered. Do it!
Step 9: Create Some Ads
Now your crisp new site is sitting on the web for all to see, it’s time to actually funnel some traffic to it.
Sign up for a Google Ads account and make yourself a new Campaign. You can leave most things as default. Just be careful of “Locations”, as it defaults to your own country, and chances are you want to be running ads worldwide.
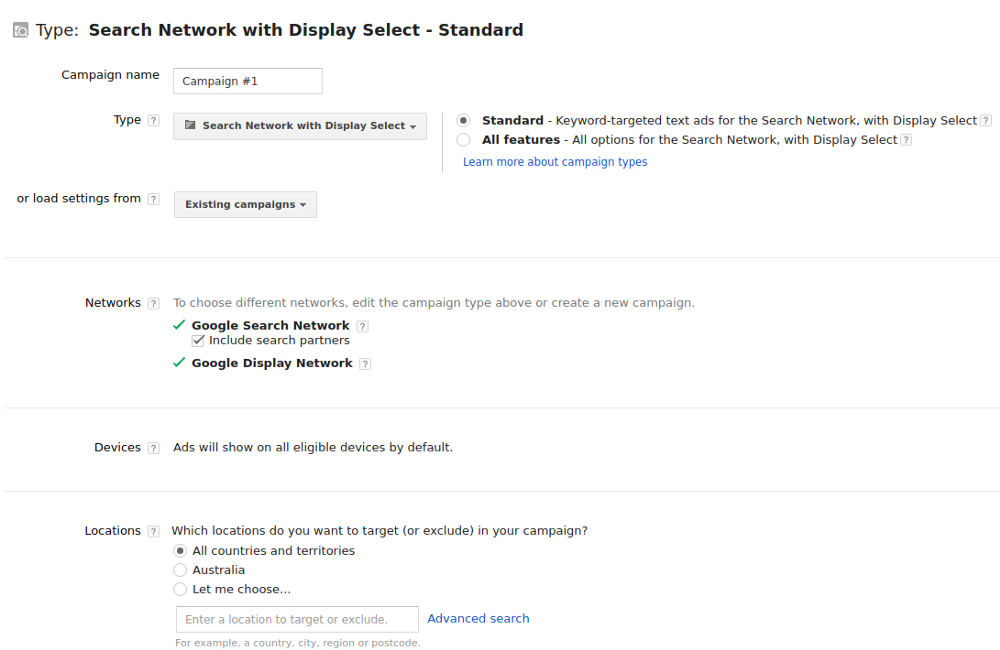
A default cost-per-click of $2 and a budget of $15 per day should give you about 10 clicks per day for a week — not enough volume to do split tests, but enough to draw some basic conclusions.
Remember how before we started you had a look at what people were searching for with Google Keyword Planner? You want to group these into themes (e.g. for me, “test business idea” and “validate business idea” are part of the same theme) and create an ad group for each.
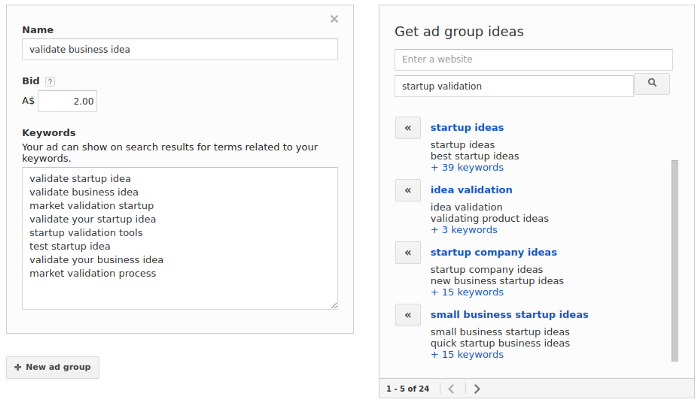
For each ad group, add as many keywords as you like, as long as they’re related to the central theme of that group. There’ll also be a suggestions box on the right which can be an easy way to fill out all the permutations and synonyms for your search.
For instance, when I was testing NicheTester I had one ad group for “Niche Marketing”, with keywords related to that, and another for “Business Idea Validation”, which you can see above.
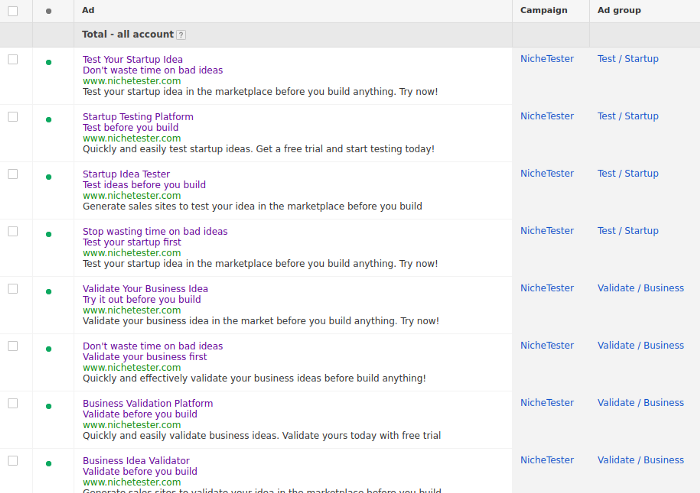
The next step will involve creating a couple of ads for each group. The simplest ad is the text you used for your landing page — make the headline of the ad the same text as your title, and the body the same text as the subtitle. Try a few variations on each, particularly around words that are used interchangeably — e.g. when writing ads for NicheTester I wrote variations for the words “validation” and “testing”, as well as “startup” and “business”. Where possible try to use the same language you did in your landing page, because Google is more likely to show an ad that’s relevant to the page it’s linked to, but if you have any off-the-wall ideas for pitching your idea you might as well throw them in too.
The great thing about ads like this is that they’ll end up in front of a lot of people, but you only have to pay when people click them. This means that bad ideas are effectively free, and you can employ as scattergun of an approach as you like.
Once you’re done, click “Save and Finish”, and after a day or two your ads will start running!
Over the coming week you’ll want to keep your eye on your campaign to see which keywords and ads are converting and which aren’t. Keep in mind that Google gets paid by the click rather than the conversion, and hence is inclined to promote ads that get a lot of clicks, regardless of how well they convert. If an ad’s getting a lot of clicks but few conversions then it’s wasting your money, and you should either pause or remove it.

Google’s Ad Policy (Update 2017/09/24)
I’m not 100% sure whether this is OK with Google’s ad policy, or whether I and the others who’ve done this have just slipped through the cracks. I know that sites with nothing more than an elevator pitch and an email form can get blocked for having no purpose other than “information harvesting”, so make sure you’ve filled out your page enough that you’re actually providing original content.
Google also has a clause about “unavailable offers” which this could be judged as falling under. However, the example talks about them in the context of the ad (no $40 Ipads), not the website… I’m not sure whether having a buy button when you don’t have a product yet counts. If anyone can clarify please message me — in any case, better to keep calls to action that you can’t deliver on (“Buy Today!”) out of the ad copy.
Step 10: Watch Your Conversion Rate
Now it’s time to sit back, relax and wait for the customers to roll in!
I’m kidding of course — most likely you’ll be checking Google Analytics every 5 minutes. Which is fine and to be expected, just make sure you don’t start changing things after a couple of hours because you haven’t had any conversions yet. Depending on how niche your market is, it’ll take a while to get enough people onto the site to actually see real results one way or another, but as more people come through you’ll start seeing your results regress to the mean of your actual conversion rate.
Conclusion: Is My Idea Validated?
Before we go further I want you to get into the mindset of a scientist — we’re here to prove or disprove a hypothesis.
A “valid” idea is just an idea that we haven’t figured out how invalidate yet. Even if you find that your idea is valid now, it may (and probably will) still fail at some point down the line for some other reason — like costs turn out to be much more than you anticipated, or a massive competitor decides to enter your space and give away the product for free, or the customers who were originally keen to use your product find that your proposed solution isn’t actually as useful as it sounds.

The most successful result we can get from this whole process is actually invalidation, because it’s concrete. If you find that your idea doesn’t work, you can either pivot with what you’ve learned or start something entirely new. You’ll have saved yourself months of work building a product, as well as the emotional toll of its failure. If you do find validation it means that your chance of succeeding is significantly higher, but your chance of failure is still considerable. What’s more, now that you’ve eliminated the most likely cause — no market — it’s more likely to be a surprise.
With that squarely front-of-mind, your experiments have probably produced one of a number of outcomes:
No one even clicked on the ad

Ah jeez. This might mean that no one wants your product, or it might just mean that you’re not communicating its value very well through your ads. You’ll have to go back to basics — is there anyone complaining about the problem on discussion forums? What kind of words are they using? How do they describe the problem? How do they describe the solution? You want to be using the same sort of language they are.
If there is, then you might have to try to iterate a bit on how you describe your product until you start seeing clicks. Potentially you might also experiment with running ads on other platforms (particularly Facebook if you’ve already tried Google) to see if you’re more successful that way.
If you still can’t make it work, then most likely you’re not onto a winner — time to dust yourself off and start again.
People clicked on the ad but the conversion rate was mediocre (0–3%)
Don’t be disheartened! This could mean invalidation… or it could be the first step to polishing your idea into something worthwhile.

People are actually clicking on your ad, which means that you’ve identified a problem that people want solved! They just don’t want your solution in its current form, so its time to start iterating to see what leads to a better conversion rate. Try lowering prices, playing with your pricing tiers, changing around copy, emphasizing some features, or de-emphasizing others. Also make sure you try as hard as you can to get interviews with potential customers, whether from signups or from other sources, so you can try to figure it out.
It’s also worth posting your landing page on the Indiehackers forum to see if they have any feedback — if they do, incorporate it and see if it changes anything.
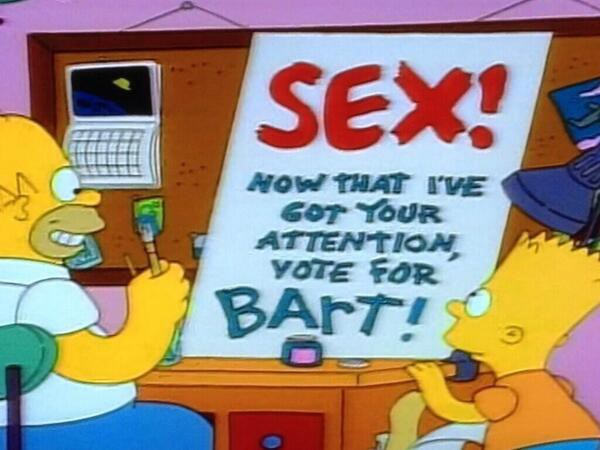
You might also want to take a closer look at your ads and try to optimize for conversion rate over click-through rate. For instance, you can get a great click-through rate by making your ad copy read “NUDE CELEB PIX”… but unless that’s what you’re selling, your conversions will be zero. Try to make your ads honest and specific: because you pay by the click, it’s actually more economical to try to stop people aren’t likely to convert from from clicking on your ad than it is to attract them in the vain hope that they’ll convert after you’ve paid for them.
Once again, don’t forget about regression to the mean — a 0% conversion rate is meaningless if you’ve only had a handful of people come through the site. Try to leave each iteration up for a couple of days to a week, bringing through 20+ people each day if you can afford it.
If after all this your conversion rate is still hovering around 0%, then you’re likely in the same situation — you have a solution to a genuine problem but no one wants to pay for it. Many founders only realize this after wasting millions in venture funding and burning themselves out forever… well done for figuring it out in advance!
If your conversion rate is greater than zero but still small, that doesn’t necessarily mean your idea is toast — you’ll just have to do the math. If you’re converting at 1%, paying $1 per click and you’re sure you can make at least $100 of lifetime profit off each customer, you’re still breaking even. However, it’s likely that hidden somewhere in the discouraging numbers is a better, more focused idea, or some better way of pitching it — keep searching for it!
People clicked on the ad and the conversion rate was solid (5+%)
Yay! Mission accomplished, right?

Sort-of. You’re over the first hurdle at least. On the upside, your idea is as valid as this process can detect. On the downside, the process isn’t perfect… and you still haven’t learned any detail about what your customers actually want, just that they’re interested enough in what you already have to click a button.
Now you should be changing your priority away from validating your idea and towards refining it, as well as building an audience. You’ll want to switch your landing page over a “buy” button to a “sign up for the beta” one — get their email address as soon as they hit that first CTA! You can also finally start building your MVP, and give the people on your list updates as you go to get feedback.
Whatever you do, don’t take this as proof that your product is going to be a success, put your head down and do nothing but develop it from now on. Marketing never ends — for every hour you put into building your MVP, you should be spending an hour getting out there, finding forums where your customers hang out, going to meetups, writing blog posts, tweeting — anything that will help you understand your market and channel potential customers into your mailing list for launch.
Good luck!